
Strabo 3D Mouse Settings
While you can use the PC's system mouse to pan, zoom in/out, or move the floating mark in Orbit Strabo, Orbit Softcopy, or Orbit Stereoview, the system also supports 3D mouses to create or edit in a fast and accurate way objects in stereo. The Preferences button (which you can find on the main toolbar of OrbitGIS X or in the sidebar of Orbit Strabo X includes the 'Strabo-3Dmouse Preferences' button. Steps to follow are:
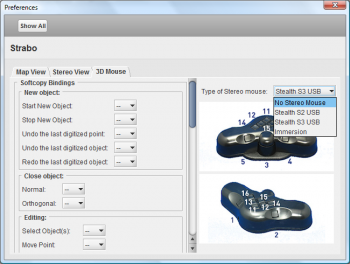
- select your type of mouse:
- no stereo mouse: conventional 2D mouse
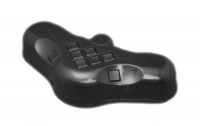
- Stealth 2 3D Mouse: see stealth3Dmouse.com
- Stealth 3 3D Mouse: see stealth3Dmouse.com
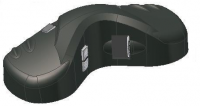
- Immersion SoftMouse: see immersionsoftmouse.com
- add functions to the mouse buttons (1-23) and keyboard keys (F1-F12)
(1) select your type of 3D mouse*:
| Stealth 2 3D Mouse | Stealth 3 3D Mouse | Immersion SoftMouse | Space Controller |
|---|---|---|---|
 |  |  |  |
 * If you don't have a 3D mouse, select 'no stereo mouse'. You can add functions to the keyboard keys (F1-F12). To activate all options of the 2D mouse, be sure that you tick on the 'free moving floating mark' option (see image beside) in the menu of the strabo window (options in menu bar, see image below).
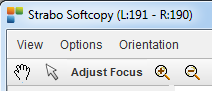
Regarding the bindings to the 2D mouse:
- navigate: press in the menu bar the pan button (hand) to zoom in/out and moving the imagery
- measure: press in the menu bar the mouse button (select button) to adjust focus and moving the floating mark
- left click (hold) = moves the floating mark in the X, Y direction
- Ctrl + left click (hold) = multiply the speed to move in X, Y
- right click = center floating mark (= 'adjust focus' in menu bar)
- scroll = zoom in/out (= 'smart zoom' in menu bar)
- scroll click (hold) = moves the floating mark in the Z direction, up and down
- Ctrl + scroll click = multiply the speed to move the floating mark in the Z direction
(2) add functions to the mouse buttons (1-23) and keyboard keys (F1-F12)*:
| Stealth 2 3D Mouse | Stealth 3 3D Mouse | Immersion SoftMouse | Space Controller |
|---|---|---|---|
  |   |  |  |
* Choose functions from the below-mentioned list - add functions for the process of:
- stereo mapping (softcopy bindings)
- dem creation (dem bindings)
- default values will be suggested
| Softcopy Bindings: | |||
|---|---|---|---|
| Thumbwheel Moves the floating mark in the Z direction, up and down. |
|||
| New Object (1) Start new object: start and continue of object creation (2) Stop new object: end of object creation (3) Undo the last digitized point (when creating new object) (4) Undo the last digitized object (of created object) (5) Redo the last digitized object (of created object) |
|||
| Close Object (1) Close normal: from floating mark to beginpoint (2) Close orthogonal: from floating mark to the perpendicular line from beginpoint |
|||
| Edit Object (1) Select Objects (in 2D) (2) Move point from selected object(s): (i) select object(s) (1); (ii) start moving point; (iii) stop moving point (3) Insert a point in the selected object(s: (i) select object(s) (1); (ii) insert point(s) (4) Move selected object(s): (i) select object(s) (1); (ii) start moving object; (iii) stop moving object (5) Rotate selected object(s): (i) select rotation point; (ii) start rotation; (iii) stop rotation (6) Rescale selected object(s): (i) select scale point; (ii) start scaling; (iii) stop scaling |
|||
| Constructions (1) Start/stop the registration of a new construction point (2) Start/stop the registration of a new construction line (3) Delete all the construction lines/points |
|||
| Toggles (1) Perpendicular drawing on/off: (i) if construction line is made: creating objectpoint parallell/orthogonal to construction line; (ii) if no construction line is made: creating next objectpoint parallell/orthogonal to previous created objectpoints (2) Multiple selection on/off (3) Visibility of the constructions on/off (4) Allow switching to other photopair on/off |
|||
| Map Canvas (1) Zoom in (2) Zoom out (3) Center on floating mark (4) Set the selected dataset height to floating mark (5) Set the height of the visible dataset to floating mark |
| DEM Bindings: | |||
|---|---|---|---|
| Thumbwheel Moves the floating mark in the Z direction, up and down. |
|||
| DEM creation (1) Go Left (2) Go Right (3) Go Up (4) Go Down (5) Set new DEM point (6) Delete DEM point (7) Undo |
Stealth 2 and Stealth 3 3D Mouse
- Strabo's softcopy tool supports the Stealth2 and Stealth 3 3D Mouse from Stealth International. This mouse is 100% compatible with the Immersion 3D SOftmouse, and works without the Immersion interface box. The stealth 2 and 3 mouse is directly plugged into the RS-232 interface of the PC. While using any of the 3D Mouses, the PC's system mouse keeps his functionality. This means e.g. that the zoom and navigation functions can be used with the system mouse at any moment.
Immersion Soft3DMouse
- Strabo's softcopy tool supports the 3D SofMouse from Immersion, next to the system mouse, for moving the floating mark. You only have to connect the interface, accompanying the SoftMouse, to the computer and restart the application (OrbitGIS) completely. No drivers have to be installed. This mouse has a set of trigger buttons, function buttons, shift and control buttons, and a thumbwheel that allows accurate Z-axis positioning. Once the interface box is connected, Strabo will automatically detect it's availability and activate the functional use of the Softmouse. This means that, if the interface box is connected and switched on, the X,Y and Z movements of the floating mark in any Strabo Stereo viewer will automatically be guided by the SoftMouse.
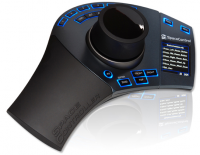
Space Controller
- Strabo's softcopy tool will support the Space Controller soon…