For documentation on the current version, please check Knowledge Base.
Step 5: Fiducial Marks
The measurement or determination of the fiducial marks positions is crucial for any viewing system.
Without fiducial mark measurement, neither stereoscopic viewing is possible, nor the block adjustment.
To be able to measure the fiducial marks the image files must be available and connected into the project using step 3 of the wizard..
Overview
If at least one image is available in the project the following dialog will show up:

Wizard Guidelines
You can choose between the next 3 items by pressing the corresponding radiobutton:
Manual
- When selecting the manual option, you can postpone the measurement of the fiducial marks and continue with the Wizard procedure.
It is a good decision to first finish the project creation phase, and save the project, and continue afterwards with the fiducial mark measurements on a more appropriate moment.
It is namely an important condition to have the correct scan direction before doing any measurement in the images.
If you decide the do the fiducial marks measurement at this moment, see the Fiducial Marks chapter for a description on how to measure them manually. - Go to the next wizard step by pressing the
 button on the wizard dialog.
Automatic
This selection leads you through an automatic procedure for the measurement of the fiducial marks.

Follow the next steps:
- Press the 'Measure …' button.
- The next dialog will be displayed:

This dialog shows the physically available images. - Select the photos for which you want to automatically measure the fiducial mark positions.
This can be done in different ways:- select some or all the photos manually.
- select all the photo using the 'Select All' button.
- After the selection, and before starting the automatic measurement, you can eventually clear the existing fiducial mark measurements for the selected images by pressing the 'Clear fiducial marks' button.
- Press the 'OK' button to start the automatic measurement of the fiducial marks.
- When the procedure is finished you will be warned with the next dialog:

- Press the OK button to return to the wizard.
- The results and MSQE for the fiducial marks can be viewed in the image detail windows.
See the Fiducial Marks chapter for more details.

Important Remark on Automatic measurement of Fiducial Marks
The automatic procedure looks for the fiducial mark using image matching techniques.
It is therefore important to have selected the correct Camera Type in the Camera definition.
The camera manufacturers have different types of fiducial marks.
Import
A last way of getting the fiducial marks is reading the positions from files.
Strabo permits to import these data from 2 sources:
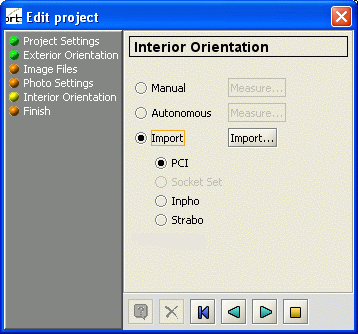
- Select the IO format for importing the fiducial mark positions by selecting the corresponding radiobutton.
- Press the 'Import' button to popup a fileselection box.
- Select the IO-export file from the 'PCI', 'Socket Set' or 'Inpho' applications containing the fiducial mark coordinates by using the Fileselection box.
- A 'PCI' project file contains the fiducial mark measurements in image coordinates e.g.:
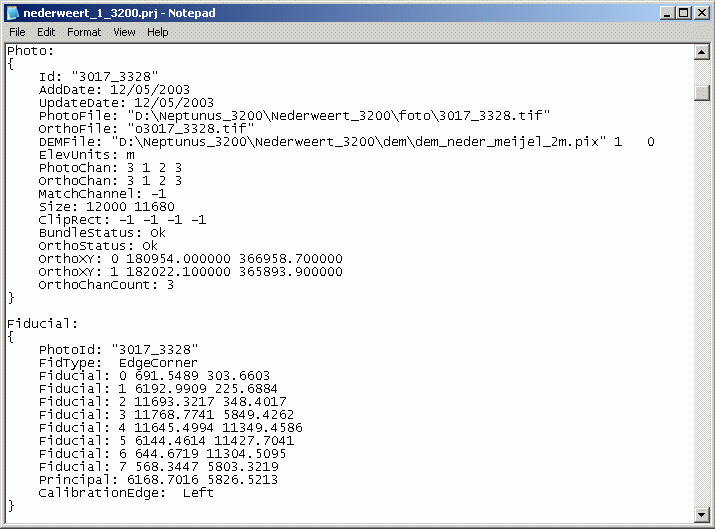
This is an example PCI project file showing data available for photo “3017_3328”. At the bottom you see the coordinates of the Fiducial Marks.
They are expressed in pixel units. - A 'Socket Set' file contains the fiducial marks expressed relative to the center of the image e.g.:

This is an example of a 'Socket Set' file containing IO data for the photos.
If the values for “Width in image pixels” and “Height in image pixels” are empty (see 'Photo Settings“ dialog of the Project wizard), the 'Socket Set' IO file cannot be imported. The corresponding radio button will be insensitive.
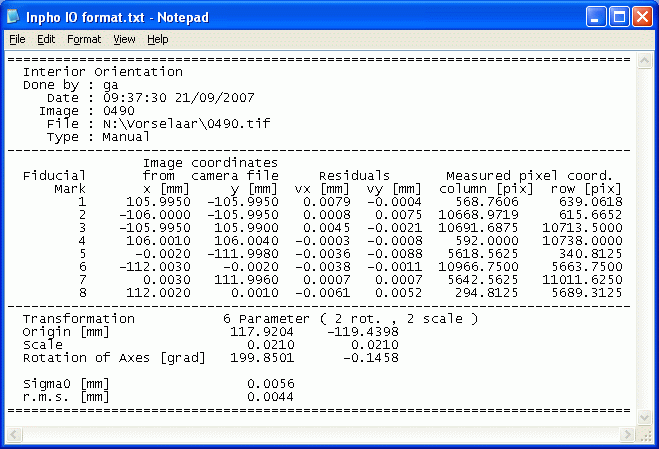
- An 'Inpho” file contains the fiducial mark coordinates in image coordinates e.g.:
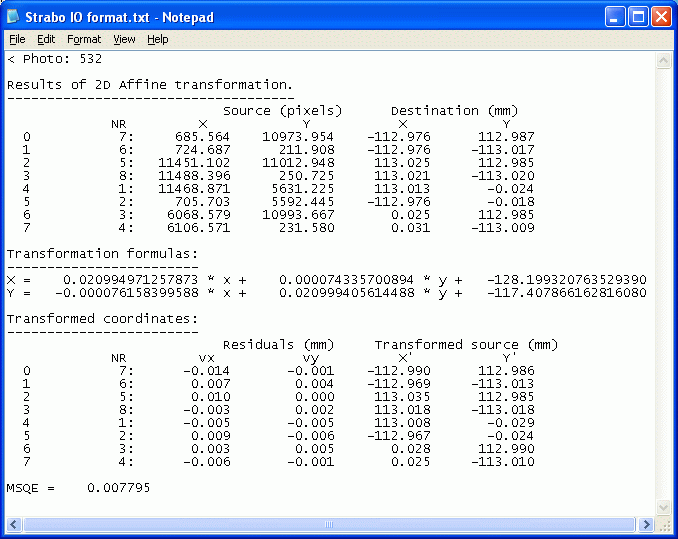
- A 'Strabo' file containing the fiducial marks can also be imported e.g. if the Internal orientation is created at the same time as the tiepoint creation on a different station.
- After opening the IO file, the procedure will start reading the information.
Some remarks are possible:- It is possible that information is available concerning photo's that are not part of the Strabo project.
In that case a message like the following will be shown:

- When the file is completely handled by the procedure a dialog is shown with some information:

This dialog shows you- the amount of photos in the project: 23
- the amount of photos having fiducial mark measurement before the automatic measurement: 0
- the amount of photos having fiducial mark measurement after the automatic measurement: 13
- the amount of photos for which the automatic measurement was executed: 13
- Press the 'OK' button to return to the wizard.


Go to the next wizard step by pressing the button on the wizard dialog.
Goto the next wizard step
Go to the next wizard step by pressing the button on the wizard dialog.