For documentation on the current version, please check Knowledge Base.
Construction Tools Sidebar
This page describes all features of the Construction Tools Sidebar .
More information about the general operations and principles of Constructions, see : Constructions Overview.
| Select Constructions | File Access | Construction Point "CPt" Functions | Construction Line "CLn" Functions | Fence (Construction Area) |
|---|---|---|---|---|
| Construction Functions operate on the selected Construction Object, either Construction Points and/or Construction Lines. | Use the File Access options to open, close, save or create a Construction file. | Use the Construction Points functions to position and measure the exact location of the Construction Points. | Use the Construction Lines functions to calculate the exact position and direction of the construction lines. | Use the Fence to describe a perimeter for diverse purposes : select objects within, hide area outside, use as source for a buffer or export to other functions. |
 |  |  |  |  |
Select Constructions
| Function | Description |
|---|---|
| | Point and click to select a construction item to activate it. Use Shift-Click to select more than 1 CPt. |
| | Delete all CPt(s) |
| | Delete all CLn(s) |
| | Delete the current fence area. |
Construction Functions operate on the selected Construction Object, either CPt(s) and/or CLn.
- CPt : You can select one or more CPt's at the time. All CPt related functions operate on the whole of selected CPt's at once.
- CLn : You can only select 1 CLn at the time. This line determines the orientation for the functions that require a CLn
Distances and Orientation
Distances used in construction functions are expressed in units of the maps shown in the map window. Use both positive as negative values in accordance to the orientation of the selected CLn.
The Orientation of a CLn is always 'from left to right' on your map window. Imagine yourself standing at the left end of the line, and looking from that position to the right end of the line. You may find yourself looking in a straight east direction, but it might as well be looking south-east or north-east.
When moving parallel : use a positive value to move to the right, negative to the left.
When moving perpendicular : use a positive value to move right, negative to move left according to the CLn.
File Access
Use the File Access options to open, close, save or create a Construction file.
| Function | Description |
|---|---|
| | create new set of constructions, or clear all current constructions |
| | open a constructions file |
 Close Close | close construction dataset |
| | Save current set of constructions to the current file |
| | Save current set of constructions to a new file |
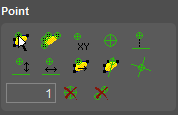
Construction Point "CPt" Functions
Use the Construction Points functions to position and measure the exact location of the Construction Points.
| Function | Description |
|---|---|
| | Create a new CPt by selecting any vertex of an object. Behavior is according to preferences. |
| | Create CPts from all vertices of the selected objects |
| | Create a CPt by entering a co-oordinate in a popup window |
| | Create a CPt visually by clicking on the map |
| | Create a new CPt(s) by calculating the foot of the selected CPt(s) on the selected CLn |
| | Create a new CPt(s) over a specified distance perpendicular to the selected CLn. First enter the distance in the toolbar. |
 Calculate over distance Calculate over distance | Create a new CPt(s) over a specified distance parallel to the selected CLn. First enter the distance in the toolbar. |
| | Create a new CPt(s) over a specified distance on the selected object. First enter the distance in the toolbar. |
| | Create new CPt(s) as intersection of all CLn(s) with objects. Behavior is according to preferences. |
| | Create new CPt(s) as intersection of all CLn(s) |
| | Use this field to enter a distance value to be used by one of the construction functions. |
| | Delete the selected CPt(s) |
| | Delete all CPt(s) |
Construction Line "CLn" Functions
Use the Construction Lines functions to calculate the exact position and direction of the construction lines.
| Function | Description |
|---|---|
| | Create a new CLn by clicking 2 points |
| | Create CLn by selecting a line from an object |
| | Create a vertical CLn |
| | Create a horizontal CLn |
| | Create a parallel line to the selected CLn |
| | Create a parallel line to the selected CLn on an exact distance. First enter the distance in the Distance field. |
| | Create a CLn perpendicular to the selected CLn |
| | Create the bisectors of the selected CLn and a CLn you click. |
| | Create a Construction Circle on an exact radius First enter the distance in the Distance field. |
| | Use this field to enter a distance value to be used by one of the construction functions. |
| | Delete the selected CLn |
| | Delete all CLn(s) |
Appearance
These Appearance options reflect the Construction Points and Lines, not the Fence.
| Function | Description |
|---|---|
 Set Preferences Set Preferences | open the preferences window |
| | Set all constructions visible / invisible with this switch |
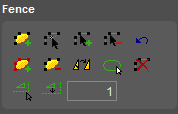
Fence (Construction Area)
Use the Fence to describe a perimeter for diverse purposes : select objects within, hide area outside, use as source for a buffer or export to other functions. A fence is a single assistance object that can consist out of several parts (each part is an area figure).
| Function | Use | Description |
|---|---|---|
| | normal | Click to start drawing a new part of the fence. Continue clicking to add points to the fence area. End by a right-click to open the context menu and choose “Stop”. During drawing from the 3rd point on, use <Shift> to create a new line perpendicular to the previous line. |
| shift | Click on a part to remove it from the fence. | |
| | normal | Move vertex : click and drag a vertex. Move segment : click and drag a segment. |
| shift | Move part instead of only the vertex or segment. | |
| control | Move vertex or segment and keep orientation of adjoining segment(s). | |
| | normal | Insert between 2 vertices : click on a segment and drag the inserted vertex to its correct position. |
| control | Click on a segment and drag the inserted vertex perpendicular to the clicked segment. | |
| | normal | Click a vertex to remove it from the fence. A fence area has at least 3 vertices. |
 Undo last action Undo last action | ||
| | normal | Add selected Object(s) : (1) Select objects, (2) Use function to add selected Object(s). Add Object Part : (1) Activate function, (2) Click on the Object Outline to add Object Part. To add Object Part, Map CRS and Dataset CRS must be the same. |
| | normal | Click on a vertex or segment to remove the part from the fence. A fence has at least 1 part. |
| | normal | Click on a vertex or segment to remove the part from the fence. A fence has at least 1 part. |
| | normal | Merge all fence areas to a single fence, and dissolves common boundaries. Coinciding segments and shared boundaries of parts are removed. |
| | normal | Click this button to select all objects within the current fence area |
| | normal | Delete the current fence area. |
| | normal | Create new parallel to the selected fence at a free, clicked, distance. Specify the distance by clicking the position through which a parallel of the fence must run. The nearest line of the fence area will be used as reference to determine the distance of the parallel. |
| | normal | Create new fence area parallel to the fence at a specific, entered, distance. Specify the distance by entering it and click the icon. |
| | Enter the distance required in the function above, “Create Parallel at Distance”. | |
| | Adjust the transparancy level of the view outside the fence area | |
| | Enable the transparancy of the view outside the fence area | |
| | Hide or show the fence outline |