For documentation on the current version, please check Knowledge Base.
Annotation Tools Sidebar
This page describes all features of the Annotation Tools Sidebar .
More information about the general operations and principles of Annotations, see: Annotations Overview.
![]() Map 2D >Tools > Anno
Map 2D >Tools > Anno
Short-key combination : <Alt> + A
| Select Annotations | File Access | New Annotations | Edit Annotation | Appearance |
|---|---|---|---|---|
| Select an annotation or delete all selected annotations. | The File Access buttons are used to open, save or close an annotation dataset. | Add a new annotations to the current annotation dataset. Pick the right annotation type and draw it on the map. New annotations have default properties. | Select the annotation object you wish to change. Apply the edits by using the functions below. | Make changes to the appearance of the annotations dataset. |
 |  |  |  |  |
Select Annotations
Select an annotation or delete all selected annotations.

| Function | Description |
|---|---|
 Select annotation item Select annotation item | Point and click to select an annotation item to activate it. Use Shift-Click to select more than 1. |
 Delete annotation item Delete annotation item | Selected annotation items are deleted |
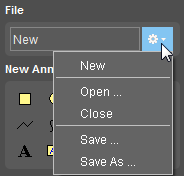
File Access
The File Access buttons are used to open, save or close an annotation dataset.
| Function | Description |
|---|---|
| New | create new annotation file, or clear all current annotation |
| Open … | open an annotation file |
| Close | close the annotation dataset |
| Save … | Save current set of annotations to the current file |
| Save As … | Save current set of annotations to a new file. Annotations can also be saved as OVF-file. |
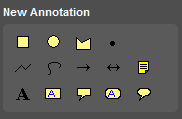
New annotations
Add a new annotations to the current annotation dataset. Pick the right annotation type and draw it on the map. New annotations have default properties.
To add an annotation object: click the icon and start drawing on the map.
| Function | Description |
|---|---|
 Rectangle Rectangle | Draw a rectangle by clicking a position and dragging the cursor. |
 Circle Circle | Draw a circle by clicking a position and dragging the cursor. |
 Area Area | Draw an area by clicking a position for each vertex and finish by clicking right and “finish annotation”. |
 Line Line | Draw a line by clicking a position for each vertex and finish by clicking right and “finish annotation”. |
 Freehand line Freehand line | Click and draw a freehand line. |
| | Draw an arrow by clicking a position for each vertex and finish by clicking right and “finish annotation”. The last click adjusts the direction of the arrow. |
 Dimension Dimension | Draw a dimension by clicking a position for each vertex and finish by clicking right and “finish annotation”. The first and the last click adjust the directions of the ends. |
 Point Point | Click a position to add an annotation point. |
 Note Note | Click a position to add a note. The text is only visible after clicking the note. |
 Text Text | Click a position and fill in text. |
 Text box Text box | Click a position and fill in text. |
 Text callout Text callout | Click a position and fill in text. |
 Text box round Text box round | Click a position and fill in text. |
 Text callout round Text callout round | Click a position and fill in text. |
Edit annotation
The edit annotation functions only apply on the selected annotation objects.

Select the annotation object you wish to change. Apply the edits by using the functions below.
| Function | Description |
|---|---|
| Select annotation | Point and click to select an annotation item to activate it. Use Shift-Click to select more than 1. |
 Duplicate annotation object Duplicate annotation object | Make a copy of the selected annotation(s) |
 Paste graphic formatting Paste graphic formatting | Select an annotation object and activate the function. Select the annotation object you wish to paste te graphic formatting on. |
 Move vertex point Move vertex point | Move vertices of line or area annotations by clicking and dragging the vertex. Use the CTRL-button to move the vertex parallel to segment. |
 Free rotate Free rotate | Rotate the selected annotation object(s). |
 Reset rotation Reset rotation | Restore default rotation of selected annotation object(s). |
 Rotate 90° counter-clockwise Rotate 90° counter-clockwise | Rotate the selected annotation object(s) 90 degrees counterclockwise. |
 Rotate 90° clockwise Rotate 90° clockwise | Rotate the selected annotation object(s) 90 degrees clockwise. |
 Move left Move left | Move the selected annotation object(s) to the left. |
 Move right Move right | Move the selected annotation object(s) to the right. |
 Move up Move up | Move the selected annotation object(s) upward. |
 Move down Move down | Move the selected annotation object(s) downward. |
Properties
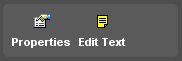
Change the presentation of the selected annotation object in the properties window.
These properties are available for vector resources, but have a default value for annotation and cannot be changed.
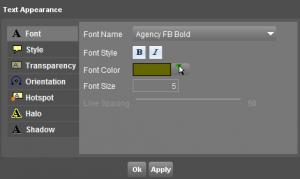
Edit Text

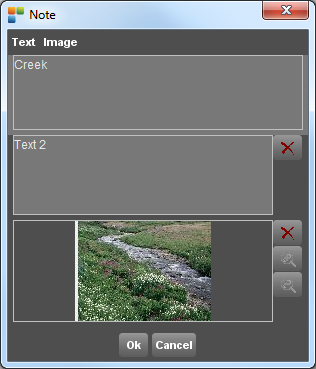
For text annotations you can edit the text or add text or images:
- Select a Text Annotation.
- Click the Edit Text icon
 :
:- Edit Text: Adjust the text in the text box and apply
- Add Text: Click the Add text button and write a text in the second text box. This newly entered text will appear underneath the first one.
- Add Image: Click the image button to select and add an image from the file browser. Only while adding it is possible to set the image size using the zoom in/out buttons.
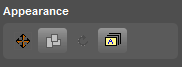
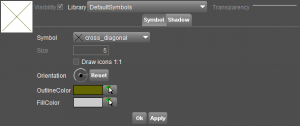
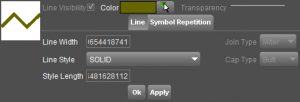
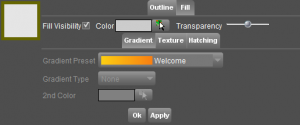
Appearance
These Appearance options reflect the Construction Points and Lines, not the Fence.
| Function | Description |
|---|---|
 Show all annotations Show all annotations | Zoom out to annotation dataset extent. |
 Show location of annotations Show location of annotations | Show location and size of the annotations within the dataset. The location is drawn as bounding rectangles. |
 Reset text size Reset text size | Reset the sizes of text annotation objects to default on the current scale. Annotation objects are given a default size referring to the scale at time of creation: this size will now be re-applied, with refrence to the current scale. |
 Toggle between scaled and unscaled text Toggle between scaled and unscaled text | Text annotations are always displayed in points on screen on the map. Therefore the text will always be even big on the map, no matter which scale is used. To set a text in units on scale, select the annotation and enable the toggle button. The text will diplay in units on scale on the scale that is set while switching on the button. Switching off the button displays the selected text in points on screen again. |