For documentation on the current version, please check Knowledge Base.
Add inventory item
The asset inventory procedure “Add inventory item“ allows the Orbit operator to create and document new objects in one of the available inventory themes.
This “Add inventory item” procedure makes it possible to document extracted features.
The ”Add inventory simplified“ procedure is designed especially to accelerate feature extraction.
![]() Procedures > Asset Inventory > Add inventory item
Procedures > Asset Inventory > Add inventory item
Theme
Select inventory theme.
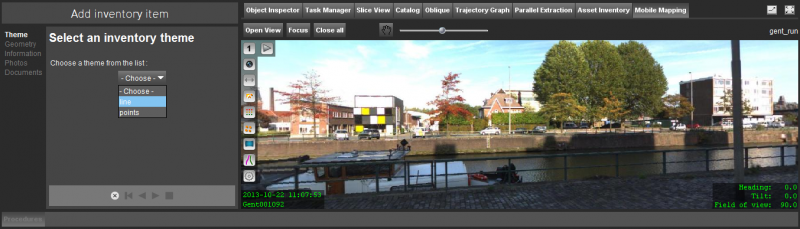
Select theme
From the drop-down list, select the inventory theme to add the new objects to.
The selected theme will be set visible and activated in the dataset list. All other inventory themes will be turned off. In a single click the operator gets full focus on the requested theme and already extracted objects.
Manage themes
Only the Orbit administrator can create new themes and manage the list of available themes, see Manage Asset Inventory Themes.
Geometry
Measure object.
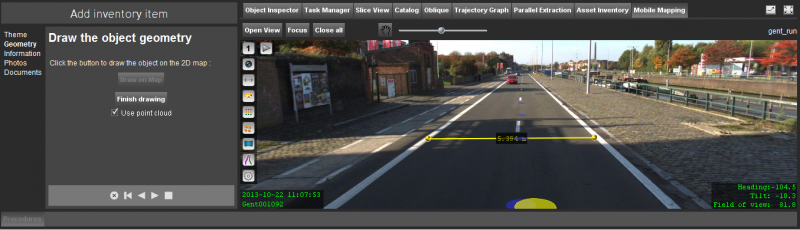
Draw on Mobile Mapping
Use point cloud
Indicate the measure method to be used before starting the object measurement.
Use the available point cloud or uncheck “Use point cloud” to measure via triangulation. If no point cloud is available this checkbox will be disabled.
Measure object
Depending the object type (points, lines, areas) of the selected inventory theme the according mobile mapping measure functions will be listed in the left-side procedure window 1).
Read all information about mobile mapping measurements : Map 3D Measurements.
Draw on Map
To draw directly on the Map Canvas follow the steps:
- Press Draw on Map
-
- Click to start drawing a new object
- Continue clicking to add points to the line or area.
During drawing it is still possible to use the right-click context menu to pan or zoom the MapCanvas.All pan and zoom functions to navigate on the MapCanvas are still available. If required the draw function can be re-activated from the contour editor. - End by a right-click to open the context menu and choose “Stop”.
During drawing from the 3rd point on, use <Shift> to create a new line perpendicular to the previous line.
- Close the Contour Editor by clicking the rightmost cross icon.

Edit 3D Objects on 2D MapCanvas
When editing or inserting vertices to 3D objects (drawn on Panoramas or in 3D View)on the 2D MapCanvas Orbit will re-use the Z from the previous object vertex. Completely new objects will have no Z value (Z = 0)!
Information
Complete attributes.

Complete attributes
Once the object measurement has been finished, the object attribute table will be displayed at the right side.
Measure attributes
Using the standard mobile mapping measure pop-up window, opened via the “Measure Attributes” button in this procedure step, any measure function can be used to make an additional informative measurement.
A single click on a measure result value copies the result to the clipboard ready to paste (keystroke <Ctrl> + <V>) as object attribute value.
Show Annotation
Click “Show Annotation” to add an annotation to the inventory item and start creating it using the annotation tools.
Click “Hide Annotation” to save and close the annotation.
Next Object
Shorthand way to save object and start next object within the same theme.
Clicking “Next Object” will save the inventory object and start a new object measurement within the same inventory theme.
Photos
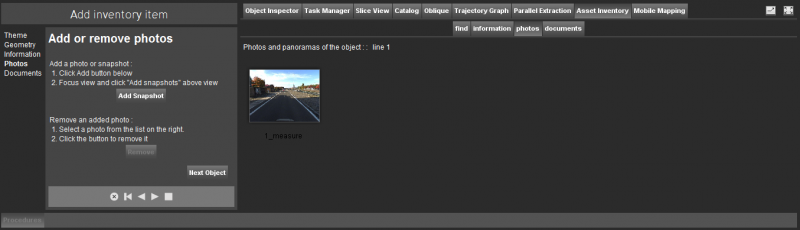
About Snapshots
- Snapshots from the mobile mapping views are stored as jpg images (ratio 4:3).
- A snapshot from the last used view while measuring will be stored automatically with the object.
- The visibility of overlays (photo positions, vector objects, attribute measurements, photo and view information) on snapshots is a generic mobile mapping view setting, available via the setting icon in the sidebar of the leftmost mobile mapping view.
- If you would like to store the attribute measurements on the snapshots, use the “Add snapshot” button in the step above.
Add Snapshot
Add one or more snapshots to the object :
- Click “Add Snapshot”
- Select and focus the mobile mapping views
- Click “Add snapshots” from the mobile mapping tab top toolbar to add all currently opened views in the mobile mapping tab.
Remove
- Select an added snapshot, the selected snapshot will be activated with blue frame.
- Click “Remove”
Documents
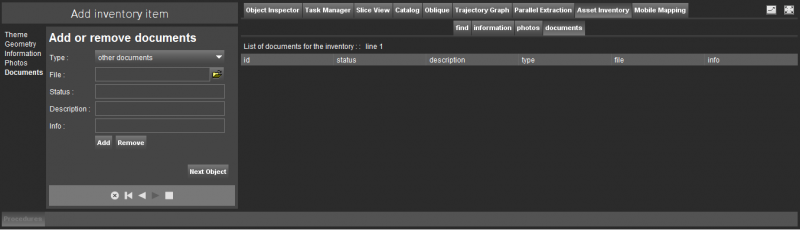
Fill in the required fields and add any document to the object :
- georeferenced maps
- other documents
- other maps