For documentation on the current version, please check Knowledge Base.

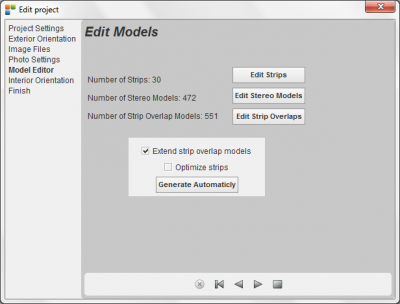
Project Wizard - Step 5: Model Editor
|
This wizard step is used to generate in a manual/automatic way the strips, stereomodels and strip overlap models. For a manual interpretation, you can select:
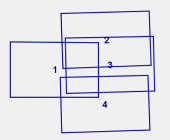
To do it in an automated way, click 'generate automaticly'. In this case you can 'extend the strip overlap models' meaning that not only strip overlap between two images next to each will be created (1-2) but also the images above/below the image (1-3 and 1-4). Optimizing strips means that two images with a photo base which is lower than 50% of the mean photobase will be deleted. |
Edit Strips
The first step concerns defining the strips, press 'Edit Strips' to get the next dialog :
This dialog shows:
- at the left side: the available images
- in the middle: the strips
- at the right side: the images that belong to a selected strip.
When starting a project, this strip list is automatically filled using the available EO parameters. If these EO parameters (Projection Center coördinates and Oriëntation Parameters) are approximate, it is possible that the strips are not 100% correctly defined. Therefore different other functions are available to correct the strip defintion if necessary.
|
|
Add new strip
Removing strips will never remove images from the project
If there photos are mistakenly assiged to a strip, they can be deleted from this strip.
When photos are not yet associated to a strip, and you can automatically select these photos in the 'Photos' column by pressing this button.
This button is used when you want to regenerate the strips. |
Edit Stereo Models
Now the strips are defined, we can create the Stereo Models.
Open the next dialog by pressing on the button 'Create Models':
This dialog shows
- at the left side: the list of availbable photos.
- at the right side: the Stereo Model - couples.
During the creation of the Strabo project, also the Stereo Models are derived automatically.
The resulting list of models will only be correct if the EO's (External Oriëntations) of the imagery are correct.
Sometimes, e.g. in case of approximate values, the automatic model creation can be incorrect. To correct the Stereo Model couples you can use the following functions:
|
|
Create model
When you select two Photos in the 'Photos' list, then this button will become sensitive and can be pressed. When a model is not correct:
You can also select one or more models (using ctrl-c), or all the models (using ctrl-a), and then delete the selection.
Reversing the model means that the Left and Right image of a stereo model are switched. If a model has to be reversed:
If you want to re-create the list of models at any time, press this button. |
Edit Strip Overlaps
Strip overlap definitions are needed when you want to do Automatic Tiepoint creation. These strip overlap definitions help the software to know where to look for strip overlap. This is how the dialog looks like:
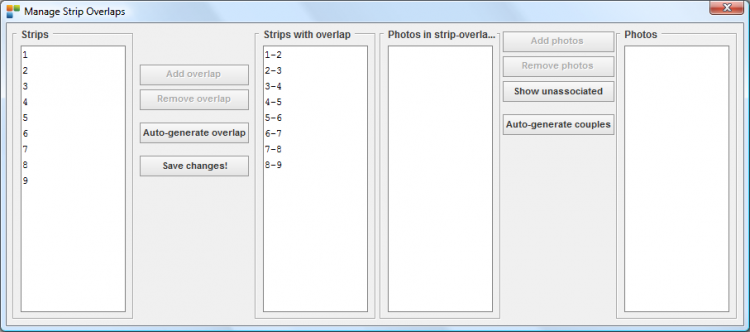
The dialog is devided in two parts:
- the left side: defining which strips have overlap
- the right side: defining a selected stripoverlap in more detail.
|
|
Strip Overlap Definition
The left side of this dialog helps you to define the Strip overlap.
When you want to add a strip overlap that is missing or that was deleted:
This function resets all strip overlap defintions and will also generete all the possible strip-overlap models in all strip-overlaps (see 'Auto-generate coupls').
Select a strip overlap in the column 'Strips with overlap'.
If necessary, you can change a selected strip-overlap configuration:
After removing models from the selected strip-overlap, you can show the photos that are now free and not used yet in a strip-overlap. In this way you can easily find these photos and use them eventually to add models.
When you have removed models, this button will recalculate the possible models in the selected strip-overlap.
|
