For documentation on the current version, please check Knowledge Base.

Project Wizard - Step 3: image files
 This wizard step relates the images that are defined in the project in the previous step, to their respective physical image files, and creates accelerated and multiresolution access to the imagery. Although in most cases the project imagery will finally be provided all together on the same folder, the images in one project may be made available in different ways e.g.:
- All the images are available on your local hard disk drive.
- All the images are available on one hard disc somewhere in your local netwerk (LAN).
- All the images are available on different hard discs spread over your local network.
- Remote access to Stereo Imagery behind the EOS Server is also supported.
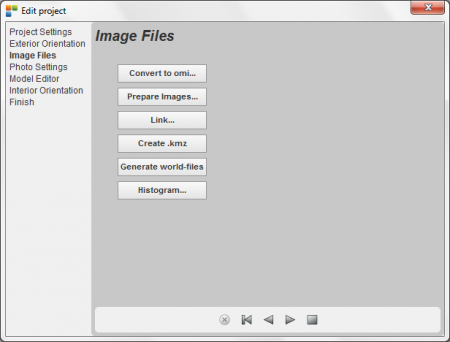
The above-mentioned display shows step 3 in the project wizard while creating a new project… If you have image files (e.g. jpg or uncompressed tif), Strabo can provide multiresolution and compression to your images and thereby optimize their access speed during viewing. If you have the images available in a multiresolution format like 'omi' (Orbit's native Multiresolution Image format), MrSID, ECW or Tiff, then you still have to run through this step for creation of metadata files (see OrbitGIS).
- Convert to Omi:
If your images are jpg or uncompressed, we strongly advise to convert the images to 'omi' format for access-speed considerations. Omi format contains multiresolution and compression, also omi-lossless is an option. You may prefer to convert to another compressed format containing multiresolution information like Ecw, MrSid, or Tiff, but you need to provide the correct licenses for formats like Ecw or MrSID from the original format provider if necessary. Reading Ecw, MrSid or Tiff is supported without specific licenses.
This 'Convert to Omi' button opens the standard OpenGIS Toolbox dialog giving you the opportunity to convert your imagery into a format containing multiresolution and compression. It is obliged to define the Target folder identical to the folder containing the original images. As you see in the next dialog, you can also use the wildcard ( * ) to process all the source images at the same time. If you prefer another format then 'omi', please select another compression and multiresolution format here:
See also here for more help regarding the Toolbox.
- Prepare Images:
At this moment you should have the original images (e.g. in jpg format) together with the converted images in a compressed and multiresolution image format (e.g. omi format), available in the same folder. The intention of this step is: (i) to rearrange the images into seperate folders and (ii) to create the necessary metadata for further use in the Strabo processing software.
Press the 'Prepare Images…' button and you will see the next dialog window:

Follow the next steps:
- Select the 'Directory' or network path where the compressed and multiresolution images are located.
- Select the correct 'Image Format' of your preferred compressed and multiresolution images (e.g. omi).
- Select images: (i) Individualy and (ii) All images (ctrl a)
- Press the 'Go' button: this will rearrange all the images in the next fashion: (i) all the original images (e.g. jpg or tif) will be put under a folder called 'original_files', and (ii) all the compressed and multiresolution images (e.g. omi) will be put under a folder called 'omi' (Under this folder also metadata will be put). The progress bars shows how the process evolves.
- Press the 'Cancel' button to interrupt the procedure.
This action will remove the unfinished multiresolution data made for the busy image.
To continue afterwards, press 'Go' to continue this process on the same directory and with the same Image Format selected.
- Press the close button to continue with the next step in this wizard.

- Link:
Once you have prepared the imagery, you are ready to link the images to the image-objects that are created in the Strabo Project using Project Wizard Step 2. When a project is copied to another location (PC or LAN …) the image paths in the Strabo project file will most probably not be correct anymore. Use this 'Link' button to link the images back into the Strabo project. Press the 'Link…' button and follow the next steps:
- Select a folder under which all (or some) images are located, using the presented File Selection Box.
- Press the 'Open' button on the File Selection Box: this will start a search in the selected folder and subfolders to find images that are defined in the Strabo project. It is possible that you do not find all of the images. A dialog shows you the result of this search: (i) Total photos in project: shows the number of photos defined in the project until now. (ii) Matched photos in the project: shows the number of image files that were found under the selected directory. (iii) Remaining photos in the project: shows the photos where no corresponding image file is found for.
- Repeat this 'Find…' action to look for the remaining images on other folders or on the LAN if the images are available on different drives on your network.
- If no photo's are available go to the next step without linking. Footprints will be shown in grey.

- Create .kmz
After the introduction of the imagery in the Strabo project by the 'Link' function described above, you can create a kmz file for showing the imagery in 'Google Earth'. This function processes all the original images in the original_files folder to make the .kmz file. The .kmz file will be put next to these images. This way you can view the project imagery in 'Google Earth' before any further processing like Aerial triangulation is performed.

- Generate word-files
This function is made for the approximate georeferencing of the omi images that are now defined into the project. It will also create a 'OCR' file (strabo_mosaic.ocr) in the image folder, which combines all these omi images into one file. This CRS file can be viewed in Orbit GIS, before any further processing like Aerial Triangulation is performed.

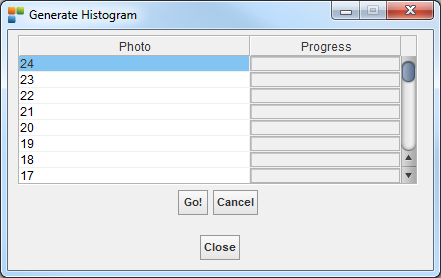
- Histogram
Pressing the “Histogram” button starts the following dialog where you can (i) select the images of your choice and (ii) press he “Go!” button to create histogram information for the selected images. The histogram data will be used enhancing the image during Stereo Vision.: