For documentation on the current version, please check Knowledge Base.

postflight: import your MAVinci flight data
Steps to be taken:
1. Save your flight data & open your generated flight plan process
2. import your flight data for processing & continue the postprocessing
1. save your flight data
Having a look at the folder structure of your generated project, you can easily see where to put your 'flight' files after the flight.
Put the images in the flight directory together with the 'orbit.csv' file (or 'projectname'.csv)

2. open your generated flight plan process
|
|
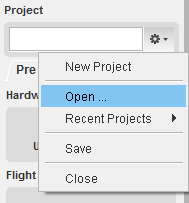
 and reactivate your generated flight project. Select the saved *name*.oup file in your directory to open . You can also drag and drop the *name*.oup file in the sidebar to open.
  .
.
3. import flight data
|
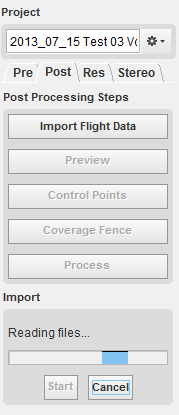
After saving your flight data at the right folder, the processing can start. Push the import flight data button and click on start. Window will appear with generic import choices.
Once accepted, the software will now:
|

If import has already been done, you will get the warning of import.

The postprocessing project will be created and shown in your mapcanvas. You will see that two extra layers will be add to your datasetlist.
- Post - Projection Centra: X, Y, Z position during image shot
- Post - Photo Footprint
You can change colors or transparancy of these layers via the legend editor of Orbit (right mouse click on the layer). These layers are created based on the values given by EO file.
To check the raw material (image and XYZ coordinates), please have a look at the video tutorial below. Via the 'show hyperlink document' you can open all raw images and check the quality.
To continue the postprocessing, go to posttab page.
|
Last modified:: 2019/03/25 11:36
|