Back to Dataset Legend Editor
All Area Legend Parameters
Outline

Fill
Set the appearance to fill the area.
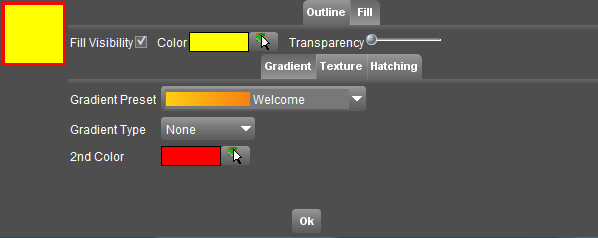
| Basic Appearance Fill | |
|---|---|
| Fill Visibility | Tick to activate the fill visibility and show a fill color in the map view. |
| Fill Color | Choose a fill color, use the Color picker. |
| Fill Transparency | Set the transparency percentage of the fill from opaque to completely transparent. |
Gradient
Add an extra color to fill the area. Both colors, Fill color and Gradient color, will pass into each other in each spatial object individually.

| Fill Gradient | |
|---|---|
| Gradient Preset | Optionally select a predefined gradient fill. |
| Gradient Type | Select the type of gradient fill (none, top, bottom, left, right, top left, top right, bottom left, bottom right). |
| 2nd Color | Choose a 2nd gradient color, use the color picker |
Texture
A texture fill will use an image as a tile to fill the area.
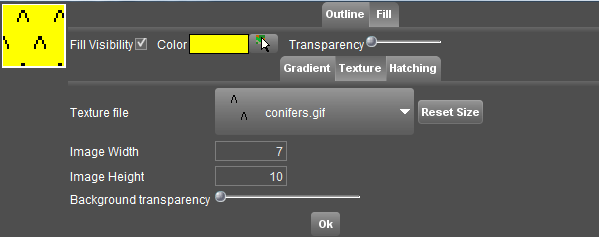
| Fill Texture | |
|---|---|
| Texture file | Select the image file to be used for texture filling. |
| Image Width | Enter the image width and select a size unit. |
| Image Height | Enter the image height and select a size unit. |
| Transparency | Set the transparency percentage of the label from opaque to completely transparent. |
Hatch
A Hatching fill will use parallel lines to fill the area.

| Fill Hatch | |
|---|---|
| First Hatch Line | Tick to activate a single hatch line. |
| Second Hatch Line | Tick to activate a second hatch line. |
| Angle | Set the angle to draw the hatch line. |
| Distance | Enter the distance between parallel hatch lines and select a size unit. |
 Click on the “Line” button to modify All Line Legend Parameters for the hatch line.
It is possible to set the hatch line transparency opaque and the general fill transparency transparent:
- Set the hatch line transparency not quite opaque.
- Set the fill transparency not quite transparent.