
Project Wizard - Step 1: project settings

In this dialog the following project parameters need to be specified:
- Project Description: define a name for the project (you are obliged to enter a project name).
- Project Type: select wether the project is a project with vertical photography (parallel camera axes), or with terrestrial photography (oblique).
Differences between the two types may be obvious, but the software also behaves differently.
The table below defines the differences:
|
|
|
- Model Overlap (%): Introduce the overlap percentage of the photographs.
The default value is 60%.
- Strip Overlap (%): Introduce the overlap percentage that exists between strips.
The default value is 20%.
- Minimum Model Overlap Tiepoints: Introduce the minimum number of tiepoints in the model overlap.
The default is 6 points.
- Minimum Strip Overlap Tiepoints: Introduce the minimum number of tiepoints per image, in strip overlap.
The default is 2 points.
- Ground Height (Km): Introduce an average ground height value expressed in Terrain Coordinates/1000.
The default value is 0.03 km.
- CRS: Introduce the Projection System (CRS or Coördinate Reference System) where the project is situated in. Select a Projection using in meter as unit. The default Projection System is “Belgian Lambert 72”.
More info, see CRS.
- A Priori STDV Control Point XY (m): Introduce the a-priori standard deviation in XY-direction expressed in terrain system units.
The default value is 0.05 meter.
This value is only used by the Bundle Block Adjustment module.
- A Priori STDV Control Point Z (m): Introduce the a-priori standard deviation in Z-direction expressed in terrain system units.
The default value is 0.1 meter.
This value is only used by the Bundle Block Adjustment module.
- A Priori STDV Observations (mm): Introduce the a-priori standard deviation of the observations expressed in mm. This is the accuracy of the measurements done in the image, normally a fraction of the pixelsize expressed in mm.
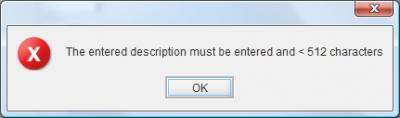 When every field is entered correctly, press the 'apply' button. If some fields are not entered correctly you will be advised to do so. E.g. When you press 'apply' without entering the project title and without selection of a camera you will see the next dialog. When all fields are finally accepted by pressing successfully the 'apply' button on the Project Settings dialog, you will automatically continue with the next step in the wizard dialog.