For documentation on the current version, please check Knowledge Base.
Raster Visualisation
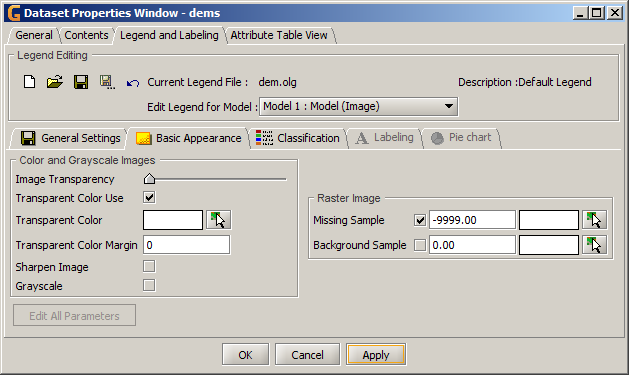
The legend tools of Orbit GIS can also be used to specify how you want a raster to be rendered. These tools are only enabled for single-band images because Orbit GIS only considers those to be rasters (this may change as Orbit GIS evolves in upcoming versions).
Legend options for Rasters are limited to :
- Basic Appearance
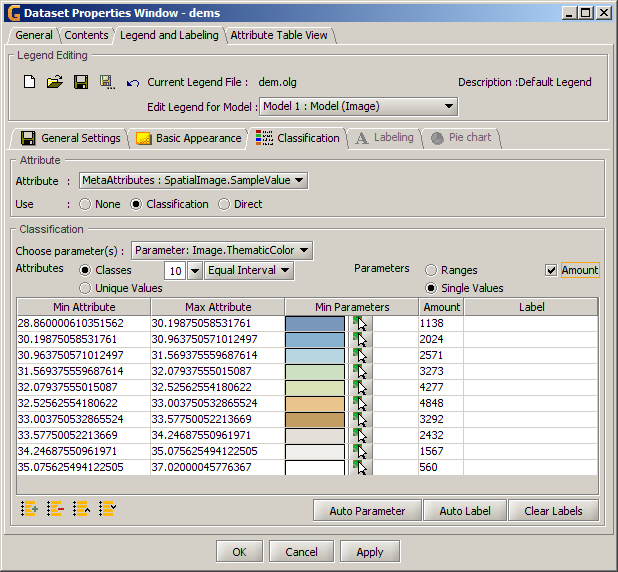
- Classification (of sample values)
Basic Appearance
Color & Grayscale Images
These are editors for generic image rendering parameters.
 Refer to the orbitgis documentation about these parameters once it's ready.
Raster Image
A raster may contain specific samples that are of no real value but rather indicate the given sample is to be ignored.
Orbit GIS allows you to configure a sample value that's to be considered “background” or a sample value that's to be considered “missing”. When configured, these values will not be used when Orbit GIS creates a histogram.
Please press the “save” button in the toolbar before proceeding.
Classification
The “Classification” tab is only enabled when a raster image is selected.
The only classification that can be made is one that classifies the “SampleValue” attribute to a “Thematic Color” parameter which is then used to render the raster.
Classification Auto Fill-In
Once mappings have been generated, the “Auto Fill-In” utility can be used to apply a gradient or palette to the mappings table.


