For documentation on the current version, please check Knowledge Base.
Introduction to the EOS Console
Use the EOS Console to configure EOS. Basically, this concerns the organization of users and their permissions, and data resources. You can run the EOS Console remotely (you do not need to sit down at the server machine). Moreover, you can use one EOS Console to administer different EOS installations from your workstation.
Start EOS Console.
Logon as EOS Console Administrator
Only registered EOS Console Administrators can work with the EOS Console.
This is your logon screen :
Enter the proper locator and user parameters and press OK :
- name of EOS Server machine
- portnumber
- name and password as EOS Console Administrator
At installation time, default EOS Administrator logins are set (see Installation). A Guest login is unavailable for EOS Console, but only for access to EOS from external applications such as Orbit Explorer or Orbit GIS Interactive.
Screen overview
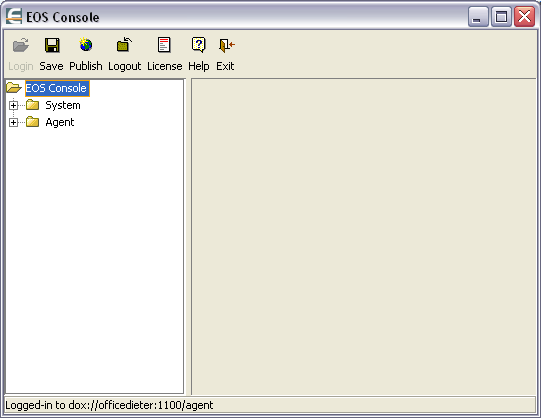
At startup, you notice a tree list on the left hand side. This is your navigator. It shows the basic items 'System' and 'Agent'. At the right side, panels appear according to the items you select in the tree.
The Toolbar
These are the toolbar functions :
![]()
![]()
![]()
![]()
![]()
![]()
![]()
 Logon: opens the logon window to connect to an EOS Server. Pops up automatically at startup.
 Save : saves changes to the EOS Server, and allows you to continue to work.
 Publish to the Web (IOS Extension required)
 Logoff : Changes are saved and you are disconnected from the EOS server.
 License : opens license files
 Help : opens these help files.
 Close EOS Console. Changes are saved and you are disconnected from the EOS server. Console application is closed while the EOS server continues.

