For documentation on the current version, please check Knowledge Base.
done
Manage and Configure Resources
Resources are managed in 2 steps. The declaration of the resource is specified in the 'System/Resources' panel, next the technical specs are set in the resource's 'Agent/Resources/…' panel.
Declaration of a Resource
Open the panel System → Resources :
This table lists all resources known to EOS. Select a resource to view it's properties :
top : system and public name
bottom : permissions
Public Name : this name appears to the users e.g. in the Orbit GIS Resource Browser.
Registry Name : internal name for resource-referencing.
Declaring a Resources
Click 'Add' an enter the resource names :
Use 'Edit' to change and 'Remove' to destroy the declaration. Note that when you remove the declaration, the technical specs are removed as well.
The position of the resource in the list is changeable. With the 'Up' button you can move up the resource, with de 'Down' button you can move the resource down.
For EDL users: the position of the resource in the list is also the position of the resource in the group 'Alles'.
Setting User Permissions
Setting Technical Specs
For each Agent, each resource requires technical specs to be defined. Open the Agent → Resources window and select the resource, for example 'streets.2007' :
Mandatory Fields
Fields in 'Resource Specification' are mandatory
Location : enter the filename or select it using the 'Select File' button.
 | This file selection box allows to select a file on the server's file system, even when operating this EOS Console remotely. In this example, we select a shapefile. WARNING: Since EOS is running as a Service, the mounted drives are those known by the Administrator account. When a user has logged on to the server, this file selection panel may show the mounted drives as know by that user. You should take care when declaring resources stored on remote drives, that all server-system users mount the drive in the same way. More information on the installation parameters page. |
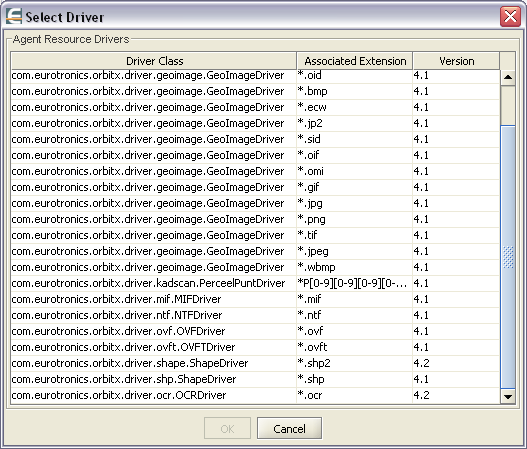
Driver : The EOS Server requires the explicit choice of a proper Resource Driver for each resource. Each file extension has its proper driver, or even several drivers are possible. The list of drivers can be checked in 'Agent → Drivers'. Click 'Select Driver' to choose the proper driver.
Warning: You have to select a driver according to the file type. If not, EOS cannot open the resource.
Optional Fields
Each resource can have a legend and resource descriptor file added. Specify these files in the according entry fields by typing or using the 'Select File' button.
More information about these files can be found on the Orbit GIS website www.orbitgis.com.
Remark: when legend and resource descriptor file share the filename with the resource, they are loaded automatically as Orbit GIS does.
Save and (un)load
With the 'Save' button, the resource can be saved from within the EOS Console. The 'Unload' button removes the resource from de EOS memory.
With autoload, the resource enters the EOS memory automatically by starting the EOS service.


