For documentation on the current version, please check Knowledge Base.
Automated Feature Extraction
This page describes the Orbit desktop extension “Automated Feature Extraction”.
Feature Extraction Pro
![]() Main Toolbar > Extensions > Automated Feature Extraction
Main Toolbar > Extensions > Automated Feature Extraction
Concepts
Automated Feature Extraction Extension is an extension devoted to finding features of certain type fully automatically based on a point cloud and set of user-defined parameters.
Independently of the type of the features we are looking for the same workflow is used:
- Define a small representative test area and run chosen Detector.
- Measure and test features which are required to be extracted but were not detected with the initial set of the parameters.
- Update parameters accordingly to the software feedback on why the features were not detected initially.
- Repeat steps 1-3 till the results are satisfactory.
- Run Detector on the whole AOI.
- Create Theme from the detected features and Verify them with Asset Inventory Verify procedure (for more information on Asset Inventory please refer to Manage Asset Inventory Themes and Verify inventory items).
Sidebar

Detectors
Select one of the available detectors.
1. Pole Detector
Pole detection is based on the geometry of the point cloud: poles are expected to be round and standing straight. Based on this assumption the process of detecting poles can be split in 3 main steps:
- Quickly exclude areas which can not contain poles.
- Find poles candidates and check if they meet the criteria of being round and straight.
- (Optional) Exclude trees, traffic signs and poles which are not on the ground.
2. Intensity Template 2D Detector
Intensity Template 2D Detector is based on point cloud reflectivity as well as shape recognition. 2D road signs are expected to have a high percentage of highly reflective points and the shape should be added in the available shape of the Shape Creator
3. Traffic Sign Detector
Traffic signs detection is based on point cloud reflectivity as well as shape recognition. Traffic signs are expected to have a high percentage of highly reflective points and the shape should be: triangle, round or square.
Source
Select point cloud dataset drop-down menu
Choose one of the available in the Dataset List *.opc point cloud files to use in the calculations.
Project
Choose where you want to store the Automated Feature Extraction results. A project represents an automatically created destination in the same folder where the source point cloud is stored.
For each run of Automated Feature Extraction extension a new project will be created. Writing new data in an existing project will overwrite existing data in that folder.
Options to create a new project, open a recent project, close or delete a project are available.
Area Delimitation (Pole Detection)
The Area of Interest (AOI) can be defined by
- Selecting polygons from an opened vector dataset.
- Drawing a polygon in Map 2D or 3D.
- Add a Fence, created with the Construction Tools Sidebar.
If AOI has not been defined the whole point cloud will be processed.
Trajectory (Traffic Signs/Intensity Template 2D Detector)
Draw, select or import a trajectory to define the area where the detection should be executed. Clear: clear all trajectories.
Traject: gives the length of the active trajectory.
Use the sliders to define the Area of Interest (AOI) around the trajectory where the detection will be executed.
- Left/Right Min and Max: the width of the AOI.
- Up: the height of the AOI.
- Down: the bottom of the AOI.
Parameters
When creating a new project the parameters are read from Preferences of Detectors and basic set of the parameters is displayed on the sidebar; advanced parameters can be accessed by small grey circle above basic parameters.
Changing parameters in the sidebar influence the currently opened project immediately, while Parameters in the Preferences are only taken into account at the moment of Project creation.
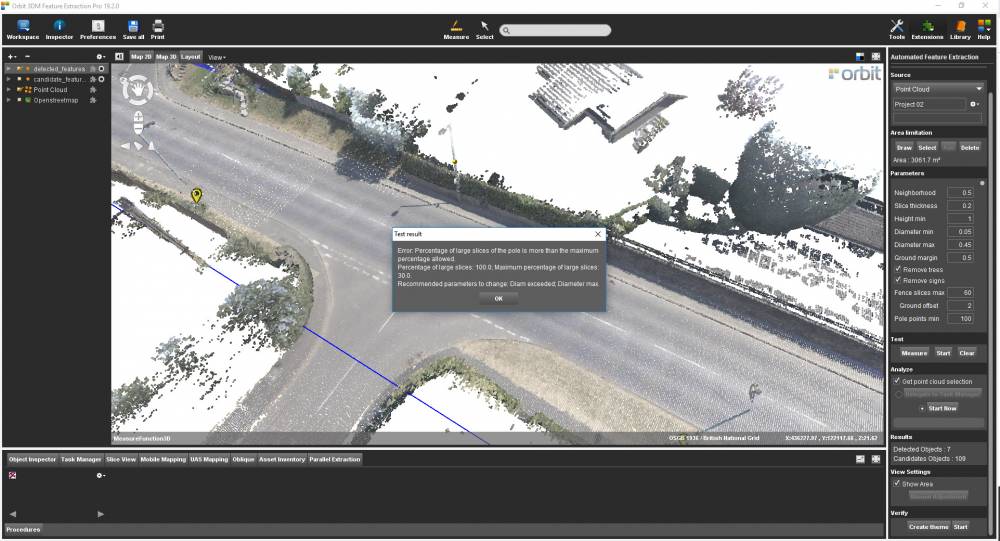
Test
'Test' allows to check if certain object will be detected by the extension as the feature of interest.
Measure
'Measure' allows you to measure the object you would like to test for conformity with the entered parameters.
Start
'Start' runs the above mentioned test. If the object conforms with the parameters then the message “Feature is detected” will be shown, otherwise Orbit will provide a tip on the calculated statistics and recommendation on which parameters need to be changed for this feature to be detected as a feature of interest.
Clear
Clears the measurement if present.
Analyze
Get point cloud selection
If this checkbox is on the points from the point cloud belonging to the extracted features will be selected (*.ops file created)
Delegate to Task Manager
Allows to schedule job to be run later by delegating it to the Task Manager.
Start Now
Start calculation of the slopes immediately.
Results
Shows the amount of detected and candidate objects.
Results are saved in temporary files in the corresponding folder (see above) and also added to the dataset list as detected_features and candidate features.
Verify
Create theme
Creates an Asset Inventory Theme which can be used for verification of the results for example.
Start
Opens the Asset Inventory Verify procedure.