For documentation on the current version, please check Knowledge Base.
Oblique View
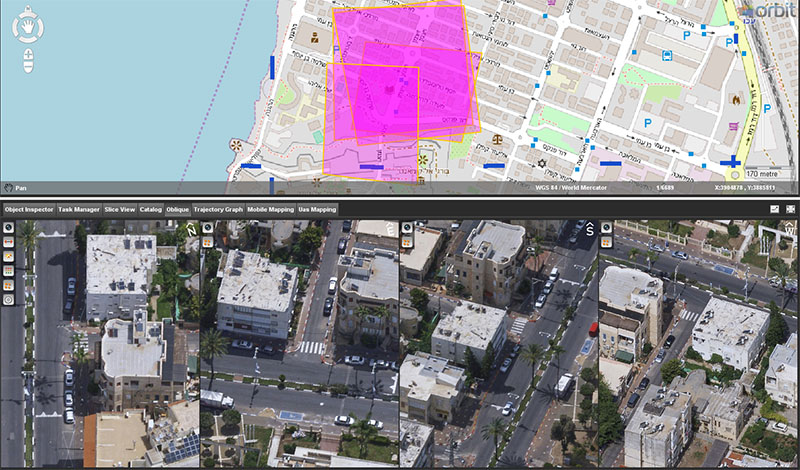
Open View from Map 2D
On opening of an Oblique Project, the oblique views will open with the focus on the center of the Project.
If the center of the map contains oblique images, they will be opened in each oblique view.
By default the Oblique views will be shown in the Oblique Tab with horizontal layout, this can be changed in the Preferences of Oblique.
Pan and Navigate
Pan function activated
![]() Pan, zoom and navigate on an image view using the Pan function. The Pan function is by default activated.
Pan, zoom and navigate on an image view using the Pan function. The Pan function is by default activated.
When Follow Zoom or Follow Focus are active navigation in one Oblique view will trigger automatic refreshing of all other Oblique views.
When Measure function is active Follow Zoom and Follow Focus get disabled. To enable them again it is necessary to Clear Measurement in the Oblique sidebar.
Move cursor in an Oblique View: The position of the hand in the current oblique view will be shown (by a small red cross) on the other oblique views and on the Map 2D if “Show position on other views” is activated in the Oblique settings.
Left Click and Drag
- In Map 2D and in an Oblique View: Move or Pan the view.
- In Map 3D: Rotate the Map 3D.
Right Click
- In Map 2D: opens Context menu containing 2 options: Pan here and Open Map 3D here.
- In Map 3D: opens Context menu containing 3 options: Pan here, Open Map 2D here and Set as a ground height.
- In an Oblique View: opens Context menu with just 1 option: Pan here.
Right Click and Drag: Move or Pan the view.
Mousewheel: scroll mouse wheel activates zoom function.
Oblique Toolbar

| | A snapshot from the last used view will be stored on the clipboard. Take into mind that a new snapshot will overwrite the previous snapshot. This to avoid a garbage of snapshots. Via the settings its possible to include the visible overlays on snapshots. |
| | The 3D Measurements panel will appear on your main Orbit window. Measuring a point, distance, area, or volume on the obliques can be done. |
| | The Vector Overlays on 3D Mapping Views will appear on your main Orbit window. The transparency and vertical offset of the overlayed vector data can be changed. |
| | The obliques view settings window (see below) will appear on your main Orbit window. Extra oblique information can be displayed on the obliques and on the taken snapshots. |
| | Detach the tab window from the main window and put it on a second screen to have a more detailed view. |
| | Maximize the tab window in the main window to have a more detailed view. |
Oblique Settings
| Display Oblique Information | Tick on to display oblique image name on the oblique views. |
| Display Overlays on Snapshot | Tick on to display the vector overlay data on the taken snapshots. |
| Show position on other views | Tick on to display the cursor position in other views. |

