This is documentation of an archived release.
For documentation on the current version, please check Knowledge Base.
For documentation on the current version, please check Knowledge Base.
Process Data
This page describes how to use the desktop mobile mapping administration procedures Process Data: Ortho from Panoramas, Ortho from Point Cloud and Colorize Point Cloud.
Content Manager
![]() Procedures > Mobile Mapping > Process Data
Procedures > Mobile Mapping > Process Data
Concepts
The “Ortho from Panoramas” and “Ortho from Point Cloud” procedures allow the user to process a 2D orthophoto. It might be very useful as background reference and for 2D digitizing. There are 2 options for producing orthos:
1. From the point cloud top view 1).
2. From the panoramas. Orthos from panoramas can only be made for the ground/floor area close to the camera positions
The “Colorize Point Cloud” procedure allows the user to add RGB values to a point cloud using the panorama images.
Ortho from Panoramas
Preparation
- Start the process until at least one *.BMP file appears in the folder <Orbit run>/panorama1_ortho.
- Copy the *.BMP file to another folder of your choice.
- Cancel the process in Orbit Desktop.
- Drag and drop the *.BMP file into Orbit Desktop.
- Make two vector files and save both vector files in the folder <Orbit run>/panorama1_ortho:
- Vehicle.ovf: This polygon type vector file should consist of one polygon covering the vehicle inside the *.BMP file.
- VehicleAxis.ovf: This line type vector file should consist of one line representing the axis of the vehicle.
- Start the process using the settings of your choice. For an overview, see below.
An example of the two vector files can be downloaded here: panorama_ortho.zip

Parameters

Ground reference
Choose the reference to define the ground. Either a fixed ground height based on the camera height or a variable ground height based on the point cloud.
Coordinate system
Choose the coordinate reference system of the Ortho Image that will be created. Note that these 2D orthos can only be produced in a projected coordinate system. Input data might be in any projection system (projected or geographical).
Resolution in meter
Resolution defines ground sample distance of the output in meters. It can be adjusted depending on the quality of the input data.
Radius in meter
Radius defines extensions of the ortho: it is measured from the camera position.
Result
The result is an orthoimage of the panoramas, stored as an Orbit Multiresolution Image within the Orbit Run structure (<Orbit Run directory>\panorama1_ortho\ortho.omi).
Examples
Mobile mapping

TIMMS

Ortho from Point Cloud
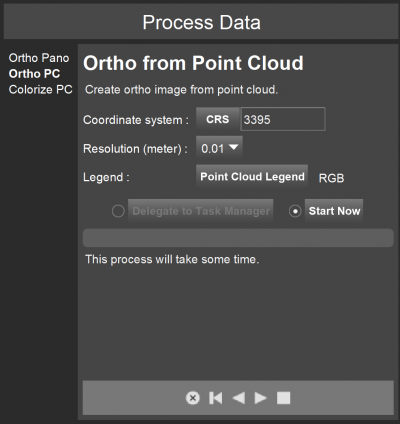
Coordinate system
Choose the coordinate reference system of the Ortho Image that will be created. Note that these 2D orthos can only be produced in a projected coordinate system. Input data might be in any projection system (projected or geographical).
Resolution in meter
The resolution defines the pixel resolution expressed in meters of the point cloud images.
Depending on the density of your point cloud the resolution can be adjusted :
- 1 or 2 centimeter resolution for high-density point clouds
- 5 or 10 centimeter resolution for low-density point clouds
Point Cloud Legend
A legend for the point cloud image can be set.
If RGB and intensity information is available, an according image can be created. An image by fixed color or height is always possible.
Only one point cloud image can be created for each legend type:
RGB, intensity, height, fixed color.
Result
The result is an orthoimage of the point cloud, stored as an OMI within the Orbit Run structure (<Orbit Run directory>\pointcloud_ortho\point_cloud_<legend>.omi).
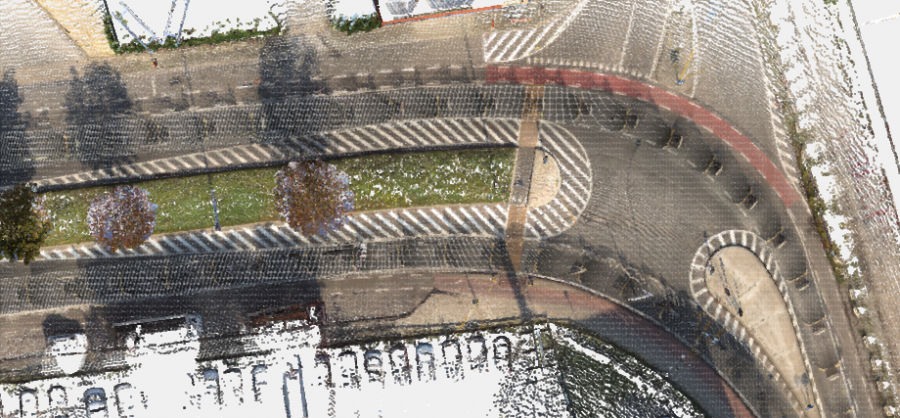
Examples
Colorization by RGB
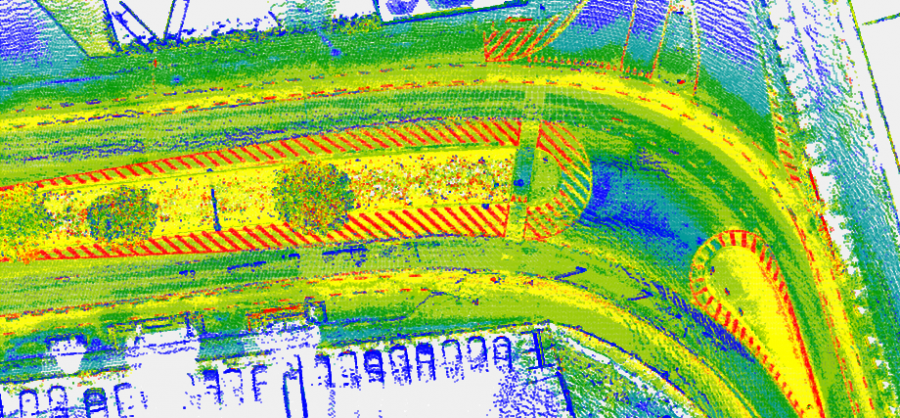
Colorization by Intensity
Colorize Point Cloud

Color by
- Position: Each point of the point cloud will be colored corresponding to the image that is spatially closest to that point.
- Time: Each point of the point cloud will be colored corresponding to the image that was taken closest in time to when the point was captured.
Max photo
Indicate how many photos are maximally used to colorize the pointcloud. Depending on the distance between the photo positions, increase or decrease this number.
Mask
Apply a mask on the imagery to exclude parts that shouldn't be used for colorisation. For example, parts of the vehicle. The mask can be created via the Mask Creator and will be automatically added to the dropdown list.
Set the mask color after selecting a mask.
1)
Process Point Cloud Image is possible for all Orbit runs imported from Orbit version 10.5 or later. Orbit runs from Orbit version 10.4 or earlier cannot be used.
Last modified:: 2023/05/12 16:31