For documentation on the current version, please check Knowledge Base.
Parallel Extraction
This page describes how to use the extension “Parallel Extraction”.
Feature Extraction Standard - Pro, Publisher Client
![]() Main Toolbar > Extensions > Parallel Extraction
Main Toolbar > Extensions > Parallel Extraction
The “Parallel Extraction” tab makes it possible to extract in a semi-automatic way linear features .
Concepts
Parallel extraction
Extraction of several parallel line features in the same time.
Files & folders
A line vector dataset must be available in the Dataset List. For the extension to be enabled, one vector dataset must be set as Recordable. All extracted objects will be automatically saved in the Recordable Dataset.
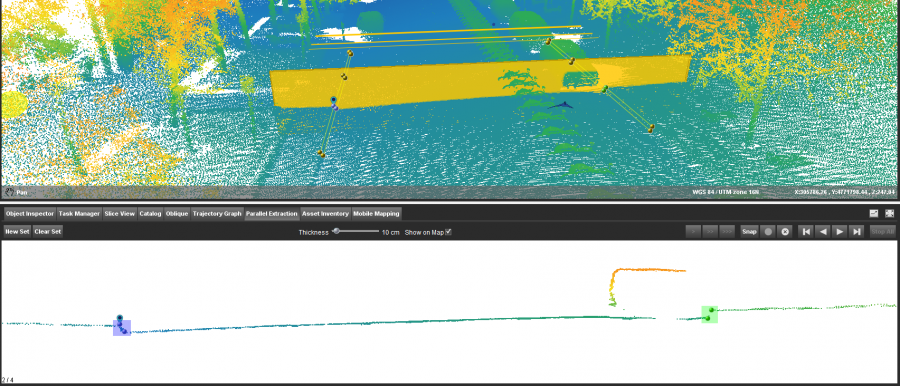
Parallel Extraction Tab
Set
New Set
Create a new set of points in order to extract features.
Define your extraction with 3 clicks:
- First click defines the starting position of the extraction
- Second click defines the direction
- Third click, perpendicular on the direction defines the width of the profile
Stop Set
Stop the process during the definition.
Clear Set
Delete all points and extracted lines.
Slice
Thickness
Adjust the slice thickness by using the slider. The default is set in Preferences of Parallel Extraction
Show on map
Check to display the slices on map or not.
Extraction Toolbar
In order, from left to right, the icons correspond to:
- advance extracted line with one small step
- advance extracted line with one normal step
- advance extracted line with one large step
The defaults for the steps are set in Preferences of Parallel Extraction.
- snap - automatically try to snap the points to the pointcloud
- save point - press to register the last drawn vertex if no modification are necessary ( grayed out if point position is modified)
- delete the extracted segment that corresponds to the last step
- move the view to the beginning
- move the view one step back
- move the view one step forward
- stop all - stop the extraction and automatically copy the extracted lines to the Recordable dataset.
Context Menu
By clicking right on any of the points, a series of options become available :
- Stop Line - stops the extraction and copies the line to the recordable dataset
- Interrupt line - stops momentarily the extraction
- Restart Line - restarts an interrupted extraction
- Remove Point - deletes the point
- Focus Views - focus the map and the tab on the selected point
- Ungroup - removes the grouping of two points
- Set direction - the direction of the extraction will be based on the selected point
Workflow
- Open the run that contains the portion to extract
- A line vector file must be set as the recordable dataset.
- Switch to Map 3D mode.
- Open the Parallel Extraction extension
- Press “New Set” and click on the Map Canvas defining the starting point, direction and width of the profile.This will automatically display the profile in the tab
- Define the extraction points location , by clicking on the profile. Each point will be the base for an extracted line. By pressing “Ctrl” two points can be grouped. A group is a set of points that behave as a single entity.For example group together the points that represent the upper and lower part of a curbstone.Like this both will be extracted as separate vectors and their position can be adjusted with only one click.
- Define as many points as needed. For example define a group for each side of the road containing the two extremities of the curbstone, and one point the the middle guardrail. Each of them will result in the extraction of a polyline.
- Start extraction by moving forward with small, normal or large steps
- For each step adjust points or groups position by moving them.To move a point, hover over it with the mouse until the cursor appearance changes, then drag the point to it's correct location.
- Use the Snap function to let the software to find automatically the right position for the points
- Navigate through the extracted portion using the tools in the Extraction Toolbar
- Finnish or stop the extraction using Stop All or the context menu