This is documentation of an archived release.
For documentation on the current version, please check Knowledge Base.
For documentation on the current version, please check Knowledge Base.
Back to Open View from Map 2D
Oblique Sidebar
The Oblique Sidebar is the lists all functions to manage the active, the currently opened Orbit Oblique Project (OOP).
Open the sidebar from the Main toolbar > Extensions drop-down > Oblique
File
Using the File block one can manage the Orbit Oblique Project. The text field displays the currently opened Orbit Oblique Project.
 | Open project | Open an available, earlier imported, project |
| Recent project | Open a recently used project. | |
| Close project | Close the currently opened project. | |
| Import project | Import a new set of raw oblique data into a new Orbit Oblique Project. | |
| Add project | Add a prepared, already processed Orbit Oblique project to your installation. | |
| Edit project | Edit or update the currently opened OOP. | |
| Remove project | Remove an Orbit Oblique project from the list of available projects within this installation. The data itself will not be removed. | |
| Process Imagery |
Project
The Project block lists some basic information of the currently opened Orbit Oblique Project.
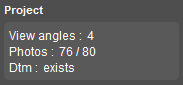 | View angles | Number of distinctive oblique viewing directions (North, East, South, West). |
| Photos | Number of calculated oblique footprints / Number of imported oblique positions. An oblique image can only be used if its according footprint could be calculated. If the number of footprints or photo positions doesn't match the expected number, the project import, import files and import configurations should be reviewed. If Orbit support is required, the according1) Orbit log file should be sent to our support team. |
|
| Dtm | There is dtm available (exists) or no dtm has been imported for this project. |
Tools
Tools to modify the oblique zoom and pan behavior.
 | Follow Focus | Toggle button to focus all oblique views onto the indicated location in one of the views. |
| Follow Zoom | Toggle button to apply scroll zoom on one of the oblique views on all views. Follow zoom and Follow focus can be combined. |
|
| Force equal scale | Optional flag used on Follow Zoom to reset all oblique views to the same scale, to the zoom level when zooming in or out. |
Footprints
Display the oblique footprints on the Map and some according configurations.
 | Drop-down box | Drop-down box to define the desired set of displayed footprints on the Map. No footprints shown - the currently displayed oblique images - all North / all East / all South or all West viewing oblique images - all oblique images. |
| Color | Click the color box to set the footprint color for the active set of oblique footprints. See item above. A different color can be set separately for each viewing direction. Defining a color for “All oblique images” or “Current oblique images” will reset the color set for each viewing direction separately. |
|
| Transparency | Slider to set transparency of all displayed footprints. |
Views
Define the Oblique Views, the windows where the oblique images are shown.
 | Direction buttons | Radio toggle button to define the view directions, the set of oblique images that must be displayed. Using the rightmost button a single viewing direction can be set. This can be useful for corridor mapping. |
| on Map / in Tabs | Display the oblique images within the Map or in the appropriated “Oblique” tab. | |
| Horizontal / Vertical / Tiled | Radio buttons to arrange the oblique views if the views are displayed in Tabs. | |
| Keep north upwards | Toggle button to rotate the displayed oblique images northwards. Up to you if you like it. |
1)
restart Orbit and redo the complete import project procedure
Last modified:: 2019/03/25 11:36