This is documentation of an archived release.
For documentation on the current version, please check Knowledge Base.
For documentation on the current version, please check Knowledge Base.

Project Settings
|
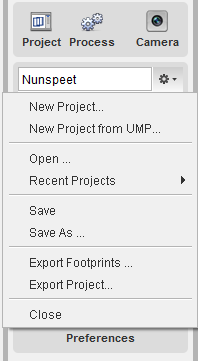
1. To create a new project, select 'New Project…' in the The Project Wizard will be started to guide you through the project definition. 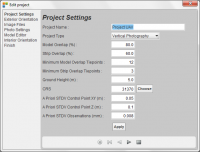
If the project was made by Orbit UMP software, you can directly generate the project from ump, selecting the 'New Project from UMP'. Select the directory where you saved the fotolist file, the images, and the ump-file.
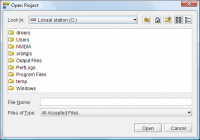
2. To open an existing project, select 'Open…' or 'Recent Projects'. The 'Open Project' box will show up. Choose an existing project by selecting a file with .spr extension. Or you can also drag/drop the .spr file directly in the project window to open.
|

|
3. Details (i.e. # linked images and # models) of the opened project are given in the Project sidebar. 4. To open the Project Wizard of the current Strabo project, press the edit button. The steps to follow are exactly the same as explained in the Project Wizard and lets you edit or inspect the project parameters of the current Strabo project. 5. You can export the footprints of the current project to a *.shp-file. 6. You can export the current project: a way to cut out an area out of a larger project (remove photos via step 4 of the project wizard (photo settings) and export the project).
|
Last modified:: 2019/03/25 11:36