For documentation on the current version, please check Knowledge Base.
Mobile Mapping Publisher Demonstrator
This page describes how to configure a demo server for your publisher.
It can host a set of Mobile Mapping projects to showcase the publishing of mobile mapping content in our various clients, such as the Web Publishing Clients (e.g. online demonstrator page), the Mobile Publishing Clients (iPhone/iPad PanoViewer App) and integrated clients (using one of the SDK's).
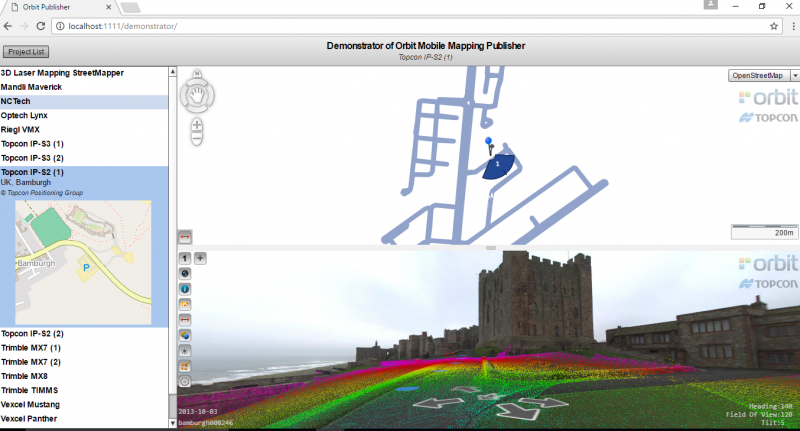
Example
The result will be similar to : Orbit Demonstrator
Install a Demonstrator
- Ordered List ItemDownload and unzip the following file : demonstrator.zip
- Copy the “Demonstrator” directory to : <Orbit Publisher installation directory>/server/program/wwwroot/
Configure a Demonstrator
Inside the Demonstrator directory the following files must be created/edited/configured
Project Location Map
<publication name>.png
One such file must be created for each publication to be hosted on the demonstrator. Create a png overview file using a basemap or any other relevant resource that shows the geographic location of your project.
The file needs to be 230×210 pixels.
As an example, see the “world.png” file in the zip folder.
Other files
extMouseWheel.js no action required
index.html no action required
moma_demonstrator.swf no action required
Publications list
index.xml
This file must be edited to contain speciffic parameters for each publication on the demonstrator.
demo projects title - name of the Demonstrator, will be present as title in the browser
initial project - name of the default project which will be opened when accessing the Demonstrator
name - name of the project, same as publication name
description - a description tag for the project, for example the region\city and country
copywrite - a tag to describe the ownership of the data
URL - url of the server, for details see: EOS Console Publishers Viewer Tab
Username and Password - username and password for the publication, for details see EOS Console Publishers Viewer Tab
Publication Name - publication name, for details see EOS Console Publishers Main Tab
Project Location Map - name of the .png file described above
Example
<DemoProjects>
 <Title>Demonstrator of Orbit Mobile Mapping Publisher</Title>
 <InitialProject>Gent_publication</InitialProject>
 <DemoProject>
  <Name>Gent</Name>
  <Description>Gent,Belgium</Description>
  <Copyright>Orbitgt</Copyright>
  <Server>
    <URL>http://publisher.orbitgt.com:1111/</URL>
    <Username>demo</Username>
    <Password>demo</Password>
    <PublicationName>Gent_publication</PublicationName>
  </Server>
  <ProjectLocationMap>Gent_publication.png</ProjectLocationMap>
</DemoProject>
</DemoProjects>
Add publications to the Demonstrator
To add new publications, just edit the index.xml file by adding the parameters for a new project in the same structure like in the example above. Also create a new overview png file that describes the area of the new publication.
Connect to the Demonstrator
Customers, or other interested parties may connect to the Demonstrator using a link similar to : <demonstrator server url>:<port>/demonstrator/